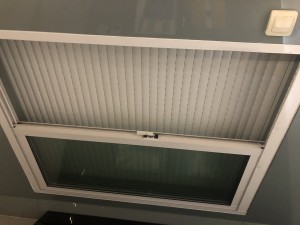
how to adjust glass shutter door
Glass shutter doors are a popular choice for modern homes, adding a touch of elegance and sophistication to any space. However, like any other functional element in your home, they may require occasional adjustments to ensure smooth operation and longevity. In this blog post, we’ll take a deep dive into every aspect of adjusting glass louvered doors, taking you step-by-step through the process.
Learn about glass shutter doors:
Glass shutters are uniquely designed to combine the transparency of glass panels with the practicality of traditional shutters. The beauty of them is that they allow natural light to flow into the room while still providing privacy and controlling the amount of light entering the space.
Why adjustments are needed:
Over time, glass shutters may start to exhibit issues such as misalignment, difficulty opening or closing, and even scratching floors. These problems can be caused by a variety of factors, including changes in temperature and humidity, structural settlement, or improper installation. Adjusting glass shutters can fix these problems, restore their functionality and prolong their life.
Tools you need:
In order to effectively adjust glass shutter doors, it is crucial to have the right tools at hand. Here are the tools you’ll need:
1. Screwdriver
2. Grade
3. Silicone lubricant
4. Tape measure
5. Pliers
6. Hammer
Gradually adjust:
To adjust glass shutters, follow these steps:
1. Inspect the door: Carefully inspect the door for any signs of damage, such as cracks, loose hinges, or misaligned shutters. Make a note of any issues that require attention.
2. Check for misalignment: use a level to make sure the door is straight. If there is any discrepancy, adjust the hinges by loosening the screws and realigning the door. After correcting the alignment, screw the screws back in place.
3. Lubricate the tracks: Lubricate the tracks and rollers with silicone lubricant to ensure smooth movement of the door. Wipe off excess lubricant with a cloth.
4. Height Adjustment: To adjust the height of the door, find the adjustment screw on the roller at the bottom of the door. Use a screwdriver to turn the screw clockwise to decrease the height and counterclockwise to increase the height. Check the door movement and adjust accordingly.
5. Solve the scratching problem: If the door keeps scratching the floor, use pliers to bend the top track up slightly. This adjustment will lift the door and prevent scratches.
6. Testing and fine-tuning: After making the necessary adjustments, test the door by opening and closing the door a few times. Take note of any remaining issues and continue adjusting until the door runs smoothly.
By mastering the art of adjusting glass shutter doors, you can keep them looking their best for years to come. Remember to perform regular maintenance, check for any signs of damage, and address issues promptly to avoid further complications. By following the step-by-step guide outlined in this blog, you’ll be able to easily adjust your glass shutters, ensuring impeccable functionality and enhancing the aesthetics of your space.
